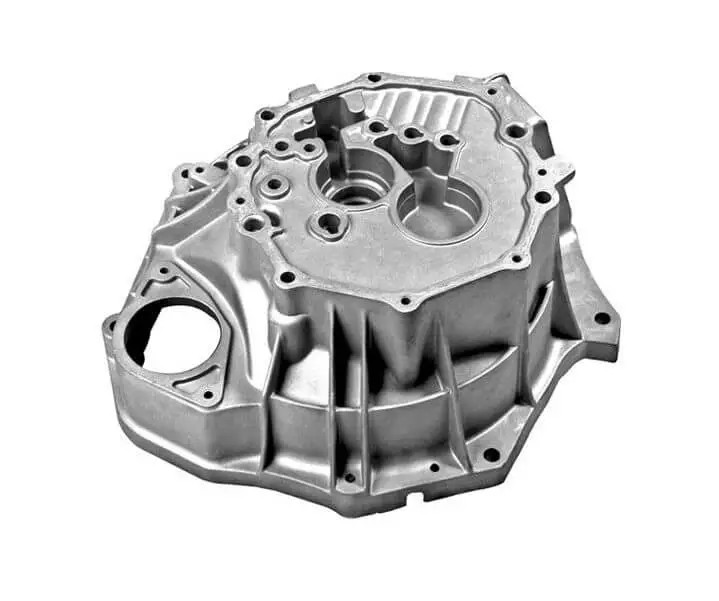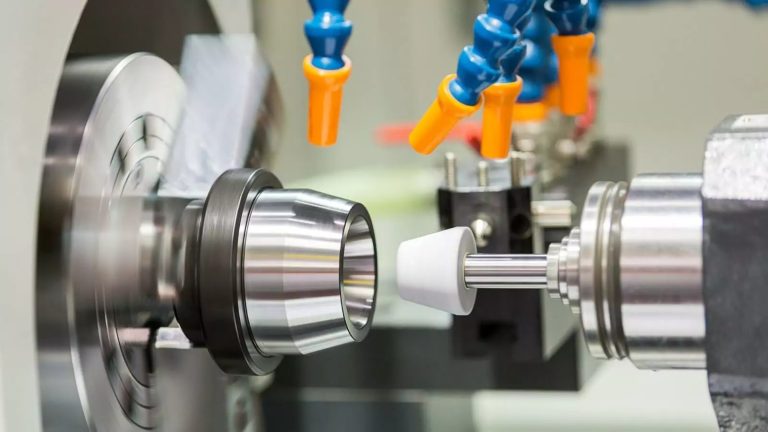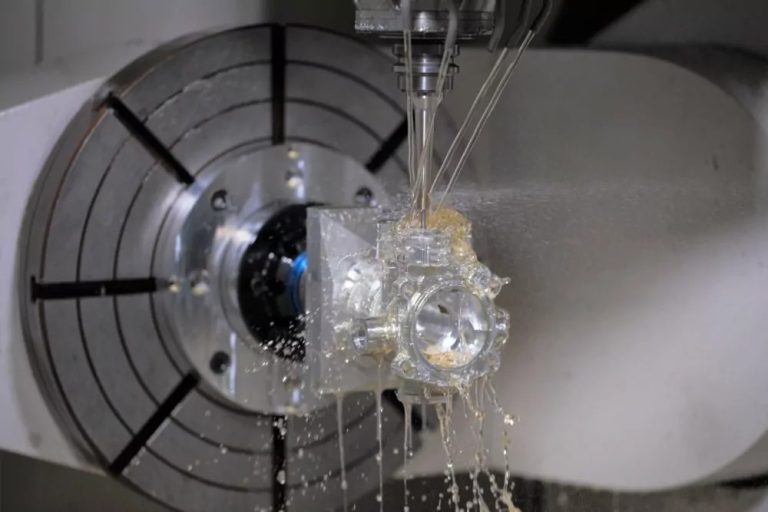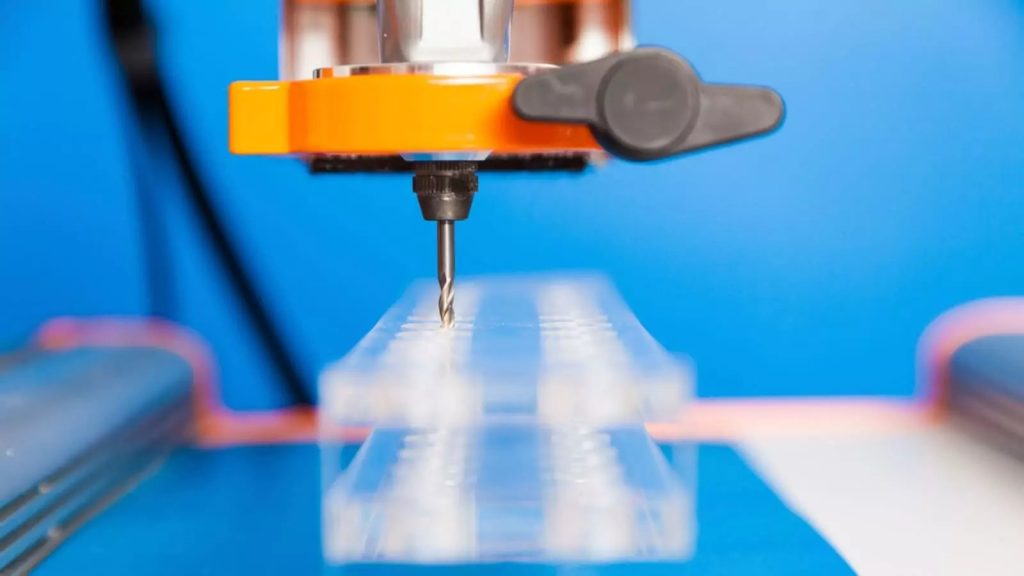
In the realm of manufacturing and engineering, the term ‘surface finish’ plays a pivotal role. Often referred to as surface texture, this concept embodies the array of physical properties and characteristics defining the final appearance and feel of a product’s surface.
Whether it’s about ensuring aesthetic appeal or meeting functional requirements, understanding surface finish is crucial.
In this guide, we will dive deep into its technology, different types, and all parameters you should be aware of.
Table of Contents
What is a Surface Finish (Surface Texture)?
A surface finish, often synonymous with surface texture, is an integral aspect of the manufacturing process. It encompasses the physical and tactile characteristics of an object’s outermost layer.
But, what exactly does this entail for you?
Imagine running your fingers over a finely crafted piece of metal or wood. The sensations you perceive, the visual appeal, and even the sound it might produce under contact—all these elements are governed by the surface finish.
This concept is not just about a smoother surface or aesthetic appeal; it’s a critical factor that influences the functionality and longevity of a product.
Isotropic
In the context of surface finishes, isotropic surfaces display uniform properties in all directions. This homogeneity means that no matter which way you measure or observe an isotropic surface, the surface texture, including its roughness and pattern, will be consistent. In many manufacturing processes, achieving an isotropic surface can be essential, especially in applications where uniformity in friction, wear, and appearance is crucial.
Anisotropic
Contrasting isotropically finished surfaces, anisotropic surfaces exhibit different properties when measured along different axes. This variation can result from specific manufacturing techniques like forging or directional machining processes. Anisotropic surfaces are not just about a distinctive look; they can offer varied functional properties like directional strength or varying frictional characteristics, depending on how you interact with them.
Why is Surface Finish Important?
The importance of surface finish in manufacturing and engineering cannot be overstated. As you delve into this world, you’ll realize that surface finish is much more than skin deep. It plays a pivotal role in determining not just the appearance but also the performance and longevity of a product. Let’s break down why surface finish is so crucial:
- Aesthetic Appeal and Consumer Perception: The first thing you notice about a product is its look and feel. A good surface finish enhances visual appeal and can significantly influence your perception and satisfaction with a product.
- Functional Performance: The surface finish directly affects how a product interacts with its environment. For instance, a smoother surface might reduce friction, essential for moving parts.
- Durability and Wear Resistance: Surface finishes can be engineered to withstand harsh conditions, resist wear, and prolong the life of a product.
- Adhesion of Coatings: If you’re applying a coating or paint, the surface texture can impact how well these materials adhere to the product.
- Reduction in Friction and Heat Generation: Particularly in mechanical applications, surface finishes can help reduce friction, thereby minimizing heat production and improving efficiency.
- Improved Conductivity and Heat Dissipation: In electronic and thermal applications, the surface finish can enhance conductivity and aid in heat dissipation.
- Control of Light Reflection and Scattering: In optical applications, the way a surface is finished can dramatically affect how it reflects and scatters light.
As you can see, the role of surface finish extends well beyond mere cosmetics. It’s a critical factor in a product’s functionality, durability, and overall performance.
Whether it’s a component in a high-tech gadget, a piece of automotive hardware, or even an everyday consumer product, the surface finish plays a key role in defining its success and longevity.
What are the Key Characteristics of Surface Finish?
Understanding the key characteristics of surface finish is essential, especially if you’re involved in manufacturing processes or simply curious about how the aesthetics and functionality of a product’s surface are determined.
The quality of a surface finish can significantly impact the product’s performance, durability, and overall appeal.
Whether you’re a product designer, a machinist, or simply someone interested in the intricacies of manufacturing, grasping these concepts will deepen your understanding of how surface finishes impact the world of manufacturing and product design.
Lay
The concept of ‘Lay’ refers to the predominant surface pattern or direction on a finished part. It’s not just about how it looks but also about how it functions. Lay can influence factors like lubrication retention in moving parts and the distribution of stresses across a surface.
Measuring Lay: Lay is usually evaluated visually or by using specialized equipment like surface profilometers. The key here is to identify the dominant pattern of the surface texture, which can be parallel, perpendicular, circular, or even random. This assessment is crucial as it directly impacts the part’s function and its interaction with other components.
Surface Roughness
Surface Roughness is a term you’ll often encounter in discussions about surface finish. It describes the small, fine irregularities on the surface, often resulting from the manufacturing process like machining or sanding. Think of it as the tiny peaks and valleys that form the surface’s topography.
Measuring Surface Roughness: The measurement of surface roughness involves quantifying these irregularities using parameters like Ra (average roughness), Rz (average maximum height), and Rmax (vertical distance from peak to valley). Tools like stylus profilometers, which glide over the surface and measure the vertical deviations, are commonly used for this purpose. These measurements provide vital data for ensuring that a surface meets the desired roughness standards for its specific application. We will give you more information on all these in the sections below
Waviness
Waviness differs from surface roughness in that it encompasses larger, more widely spaced irregularities on the surface. These are usually the result of warping, vibration during machining, or heat treatment processes. Surface waviness can affect how parts fit together and can lead to issues in assemblies if not controlled.
Measuring Waviness: To measure waviness, we use an approach that focuses on the broader wave patterns on the surface, excluding the finer details captured in surface roughness. Tools for measuring waviness are similar to those used for roughness, but they are set to filter out the finer details. The key parameters here are Waviness spacing (Wsm), which is the distance between the peaks of the waves, and the wave height, defined by average waviness (Wa) or total waviness (Wt). Understanding waviness is crucial for applications where surface contact and sealing are important, as well as for aesthetic purposes where a smooth, even surface is desired.
What are the Symbols and Parameters Used to Evaluate Surface Finish?

In the intricate world of manufacturing and engineering, understanding the surface finish symbols and roughness parameters used to evaluate surface finish is crucial. These measurements and surface roughness symbols are not just arbitrary figures; they are the language that communicates the quality, functionality, and suitability of a surface in its intended application.
Ra – Average Surface Roughness
Ra, or Average Surface Roughness, is a fundamental parameter in surface finish evaluation. It represents the arithmetic average of the absolute values of the surface’s roughness profile heights measured from a mean line.
In simpler terms, it’s like measuring the average hills and valleys of a surface’s texture. Ra is vital because it gives you a general idea of the surface’s smoothness and can be critical in applications where surface contact, wear, and lubrication are factors.
Ra is typically measured in microinches (µin) or micrometers (µm).
Calculation/Formulation: The Ra value is calculated by taking the average of the absolute values of the vertical deviations from the mean line across a sample length of the surface. Mathematically, it’s represented as the integral of the absolute value of the roughness profile height over the evaluation length, divided by that length.
Rmax – Vertical Distance from Peak to Valley
Rmax is another critical parameter, representing the vertical distance between the highest peak and the lowest valley within a given surface segment. It’s essential because it indicates the extremes of surface irregularities, which can be crucial in applications requiring tight sealing or smooth gliding surfaces.
Rmax is usually measured in the same units as Ra, µin or µm.
Calculation/Formulation: Rmax is determined by measuring the highest peak and the lowest valley in the sample length and calculating the vertical distance between these two points.
Rz – Average Maximum Height of the Profile
Rz is an international standard parameter that provides a more comprehensive view of the surface texture.
It is calculated by dividing the roughness profile into five equal lengths, measuring the height difference (Rt) between the highest peak and lowest valley in each section, and then averaging these values. Rz is crucial in applications where a more detailed understanding of the surface’s peaks and valleys is necessary, such as in high-precision engineering.
Like Ra and Rmax, Rz is also measured in µin or µm.
Calculation/Formulation: To calculate Rz, you first measure the total roughness (Rt) in each of the five segments across the evaluation length. Then, you find the average of these five Rt values to get the Rz value.
Rp – Maximum Peak Height
Rp, or Maximum Peak Height, measures the height of the highest peak within a given sampling length from a mean line. Imagine a mountain peak on a landscape – Rp is the height of the tallest one in a specific area.
This parameter is critical because it determines the maximum irregularity on a surface, affecting aspects like friction, wear, and sealing capabilities.
Rp is usually measured in microinches (µin) or micrometers (µm).
Calculation/Formulation: To calculate Rp, you measure the height of the highest peak above the mean line within the sampling length. This value represents the extreme protrusion that might affect how surfaces interact with each other.
Rv – Maximum Valley Depth
Rv, or Maximum Valley Depth, is the measure of the depth of the deepest valley from the mean line within the sampling length. Think of it as measuring the depth of the deepest ocean trench on the seabed. Rv is important as it indicates the deepest indentation on a surface, impacting factors like material retention and stress concentration.
Rv is measured in the same units as Rp, µin or µm.
Calculation/Formulation: Rv is determined by measuring the depth of the deepest valley below the mean line in the specified length. This value is crucial for applications where the depth of surface indentations plays a significant role.
PE – Profile Roughness
Profile Roughness, denoted as PE, is a comprehensive measure of a surface’s roughness profile. It considers the entire profile of the surface, including both the peaks and valleys. PE is vital in providing a complete understanding of the surface’s topography, influencing factors like contact area, heat distribution, and aesthetic aspects.
Units and Symbol: PE is typically measured in microinches or micrometers.
Calculation/Formulation: PE is calculated by assessing the entire roughness profile over a specified evaluation length. It involves measuring both the heights and depths of irregularities to provide a detailed representation of the surface’s overall texture.
RMS – Roughness Average Magnitude Surface
RMS, or Roughness Average Magnitude Surface, is a statistical measure that provides an average of the surface’s roughness by squaring the surface height values before averaging.
This method gives more weight to extreme values, thus offering a detailed view of the surface’s texture. RMS is crucial in applications where precise surface roughness is needed for performance, like in aerospace components or precision instruments.
RMS is measured in microinches or micrometers.
Calculation/Formulation: To calculate RMS, you square the height values of the surface profile, take their average, and then take the square root of this average. This calculation provides a more accurate representation of the surface texture, especially in capturing extreme variations.
PS – Profile Smoothness
Profile Smoothness (PS) measures the uniformity and evenness of a surface.
Imagine the surface of a perfectly polished mirror, exhibiting minimal irregularities; that’s an example of high profile smoothness. PS is crucial in applications where surface uniformity affects performance, such as in optical components or sealing surfaces.
PS is typically measured in microinches (µin) or micrometers (µm).
Calculation/Formulation: PS is calculated by taking the average of the absolute deviations from the mean line of a surface profile, offering a quantifiable measure of the surface’s overall smoothness.
PT – Profile Tolerances
Profile Tolerances (PT) refer to the permissible deviations from the specified profile of a surface. For instance, in a gear tooth, PT would define how much the actual profile can deviate from the ideal profile without affecting the gear’s performance.
PT is also measured in microinches or micrometers
Calculation/Formulation: PT is determined by establishing acceptable upper and lower limits for deviations from the specified profile, ensuring the surface meets functional requirements.
Rt (Total Roughness)
Rt, or Total Roughness, is the total vertical distance between the highest and lowest points of a surface profile. It’s akin to measuring the total vertical terrain variation over a specific length. Rt is significant in applications where extreme surface deviations can impact performance, such as in sealing surfaces.
Units and Symbol: Rt is measured in microinches or micrometers
Calculation/Formulation: Rt is calculated by identifying the highest peak and the lowest valley within the evaluation length and measuring the vertical distance between these two points.
Roughness Value
The Roughness Value is a specified parameter that indicates the desired level of surface roughness for a particular application. It sets a standard for manufacturing and quality control processes.
Z(x)
Z(x) represents a specific roughness profile over a predetermined length L, used in calculating average roughness. This measure is crucial in analyzing the surface texture in detail, allowing for a comprehensive understanding of the surface’s characteristics.
L (Profile Length)
L, or Profile Length, is the length of the surface over which the roughness is evaluated. It’s essential for ensuring that the measured area is representative of the surface’s overall characteristics.
Cut-off Length
The Cut-off Length is the required length for a sample measurement in surface roughness assessment. This length is critical for achieving accurate and representative measurements of the surface finish.
Roughness Grade Numbers
In surface finish, Roughness Grade Numbers (RGNs) are pivotal. These grades provide a standardized scale to quantify the surface roughness, crucial for ensuring parts meet specific requirements in various industries.
Each grade has distinct physical characteristics and is preferred for different applications. Understanding these grades helps you choose the right level of roughness for your project.
RGN 0.05 – Ra 0.05 µm (2 µin)
- Characteristics: Exceptionally smooth and fine surface.
- Uses: Ideal for high-precision lenses and optical components where minimal surface irregularity is critical.
- Calculation: This grade is defined by an average roughness (Ra) of 0.05 micrometers, calculated as the arithmetic mean of absolute values of the surface deviations from the mean line.
RGN 0.1 – Ra 0.1 µm (4 µin)
- Characteristics: Ultra-smooth surface, slightly rougher than RGN 0.05.
- Uses: Common in precision sealing surfaces and air-bearing surfaces.
- Calculation: Achieved when the Ra value is maintained at 0.1 micrometers.
RGN 0.2 – Ra 0.2 µm (8 µin)
- Characteristics: Very smooth surfaces.
- Uses: Used in high-end mechanical components like gyroscopes and precision bearings.
- Calculation: Attained with an Ra value of 0.2 micrometers.
RGN 0.4 – Ra 0.4 µm (16 µin)
- Characteristics: Smooth surface with slight texture noticeable upon close inspection.
- Uses: Suitable for parts in precision machinery and fine mechanical components.
- Calculation: Defined by an Ra value of 0.4 micrometers.
RGN 0.8 – Ra 0.8 µm (32 µin)
- Characteristics: Standard quality for many precision engineering applications.
- Uses: Common in automotive and aerospace components where a balance between smoothness and material grip is needed.
- Calculation: Characterized by an Ra value of 0.8 micrometers.
RGN 1.6 – Ra 1.6 µm (63 µin)
- Characteristics: Noticeable texture but still relatively smooth.
- Uses: Ideal for general machine parts, pump parts, and hydraulic components.
- Calculation: Achieved with an Ra value of 1.6 micrometers.
RGN 3.2 – Ra 3.2 µm (125 µin)
- Characteristics: Moderately rough surface.
- Uses: Common in less critical parts like general hardware and construction components.
- Calculation: Defined by maintaining an Ra value of 3.2 micrometers.
RGN 6.3 – Ra 6.3 µm (250 µin)
- Characteristics: Rougher surface texture, visible to the naked eye.
- Uses: Suitable for less refined applications like certain industrial equipment and consumer products.
- Calculation: Attained with an Ra value of 6.3 micrometers.
RGN 12.5 – Ra 12.5 µm (500 µin)
- Characteristics: Clearly rough surface.
- Uses: Often found in components that require increased friction or grip.
- Calculation: Defined by an Ra value of 12.5 micrometers.
RGN 25 – Ra 25 µm (1000 µin)
- Characteristics: Very rough surface.
- Uses: Used in applications where surface finish is not critical, such as in some castings and rough forgings.
- Calculation: Achieved when the Ra value reaches 25 micrometers.
RGN 50 – Ra 50 µm (2000 µin) to RGN 800 – Ra 800 µm (32000 µin)
- Characteristics: Progressively coarser surfaces.
- Uses: These grades cater to very rough and coarse applications, often in heavy machinery, agricultural equipment, and non-aesthetic components.
- Calculation: Defined by their respective Ra values, increasing in roughness from RGN 50 up to RGN 800.
What are the Common Methods to Measure Surface Finish Roughness?

Measuring the roughness of a surface finish is a critical step in manufacturing and quality control. It ensures that a product meets the required specifications and is fit for its intended use. Various methods, each with its specific tools and applications, are used to measure surface finish roughness.
Direct Measurement Methods
Direct measurement methods involve physically contacting the surface with a tool, such as a stylus profilometer. This device glides over the surface, with the stylus moving up and down as it encounters peaks and valleys. The movements are then translated into a profile of the surface’s roughness.
Usage: This method is most useful for surfaces where high precision is required. It is ideal for controlled environments where the tactile feedback of the stylus provides accurate readings. However, it should not be used on soft or easily deformable surfaces, as the contact may alter the surface’s texture.
Non-contact Methods
Non-contact methods involve using optical or laser systems, like laser scanning confocal microscopes, to measure surface roughness. These systems project a beam onto the surface, and sensors measure the diffraction or reflection of the light beam to determine the surface profile.
Usage: Non-contact methods are ideal for delicate or soft surfaces where contact measurement could cause damage. They are also suitable for rough surfaces or those with complex geometries. However, their accuracy may be affected by the surface’s reflectivity and color.
Comparison Methods
Description and Tools: Comparison methods involve comparing the surface in question with a standard set or samples that have a known roughness. Surface roughness comparators, which are sets of standard surfaces, are commonly used in this method.
Usage: These methods are quick and cost-effective, suitable for on-the-spot assessments. However, they are less accurate and more subjective than direct measurement methods. They are best used when precise measurements are not critical.
In-process Methods
In-process methods measure surface roughness during the manufacturing process itself. Tools like in-line profilometers or integrated sensors in CNC machines are used. These tools provide real-time data on the surface finish, allowing for immediate adjustments.
Usage: In-process methods are most useful in high-volume production environments where continuous monitoring is needed to ensure consistent quality. However, they may not be as accurate as post-production measurements and require integration into the manufacturing process.
Profiling Techniques
Profiling techniques involve creating a detailed profile of the surface using tools like 3D profilometers. These devices provide a three-dimensional view of the surface, offering detailed insights into its topography.
Usage: These techniques are ideal for surfaces where a detailed understanding of the texture is required, such as in research and development. However, they can be time-consuming and require sophisticated equipment.
Area Techniques
Area techniques measure the surface roughness over a larger area rather than a single line profile. Tools like optical profilometers and interferometers are used, which can capture a broader view of the surface’s topography.
Usage: Area techniques are useful for surfaces with varied textures or where an overall view of the surface finish is needed. They are less effective for very fine or detailed surface analysis.
Microscopy Techniques
Microscopy techniques, such as electron microscopy, provide a highly magnified view of the surface. These techniques are capable of revealing detailed information about the surface at a microscopic level.
Usage: Microscopy is most useful in scientific research or in industries where extreme precision is required, such as semiconductor manufacturing. However, these techniques are complex, time-consuming, and require highly specialized equipment.
What are the Factors Affecting Surface Finishes?
Surface finishes in manufacturing are influenced by a myriad of factors. Each plays a crucial role in determining the final appearance, texture, and functionality of the product. Understanding these factors is key for anyone involved in manufacturing, engineering, or quality control.
- Material Removal Feeds and Speeds: The rate at which material is removed from a workpiece significantly affects the surface finish. Higher feed rates can lead to a rougher finish due to increased vibration and heat, while slower speeds might produce a smoother surface but can increase manufacturing time and costs.
- Machine Tool Condition: The condition of the machine tool, including its stability and precision, directly impacts the quality of the surface finish. Worn or poorly maintained equipment can lead to irregularities on the finished surface.
- Toolpath Parameters: The path followed by the cutting tool affects the surface texture. Overlapping passes can create smoother finishes, while non-overlapping passes might lead to a patterned or ridged surface.
- Cut Width (Stepover): This refers to the amount of overlap between each tool pass. Smaller stepover distances can result in a finer finish as each pass removes a smaller amount of material, allowing for more precise control.
- Tool Deflection: If a cutting tool bends or deflects during operation, it can lead to uneven material removal, affecting the surface finish. This is often influenced by tool material, length, and diameter.
- Temperature: High temperatures generated during machining can alter the material properties and lead to thermal expansion, affecting the surface quality. Managing heat through proper tool selection and coolant use is crucial.
- Cut Depth: The depth of each cut can influence the surface finish. Deeper cuts might remove material faster but can also cause more stress on the tool and workpiece, potentially leading to a rougher finish.
- Vibration: Excessive vibration during machining can create an uneven surface finish. This can be due to various factors, including imbalanced tools, unsuitable machine settings, or external disturbances.
- Coolant: The type and flow of coolant can affect surface finish. Coolants reduce heat and remove chips from the cutting area, which can improve surface quality. However, improper application can lead to issues like staining or corrosion.
What are the Different Techniques Used to Achieve Desired Surface Finishes?

Achieving the desired surface finish is a critical aspect in the manufacturing process, affecting not only the aesthetic appeal of a product but also its functionality and performance. Various techniques are employed to attain specific surface finishes, each with its unique application and resulting texture.
Machining
Machining is a process of removing material from a workpiece to achieve a desired shape and surface texture. It includes processes like milling, turning, and drilling.
- Common Surface Finishes: Machining can produce a range of finishes, from rough cuts to finely machined surfaces. The exact finish depends on factors like the cutting tool used, speed, feed rate, and the material of the workpiece.
Types of Machining Finishes:
- Rough Machining: Typically leaves visible tool marks and is suitable for surfaces that do not require high precision.
- Fine Machining: Offers a smoother finish with less noticeable tool marks, ideal for surfaces that need to be precisely machined.
- High Precision Machining: Achieves very smooth surfaces with minimal tool marks, used for parts that require tight tolerances and high-quality finishes.
What is the standard surface finish in machining?
The standard surface finish in machining varies depending on the application but typically falls within the range of Ra 0.8 to 3.2 µm (32 to 125 µin). This range balances manufacturing cost and part performance for a wide variety of applications.
xinYang surface finishes
xinYang provides top-tier surface finishing services for components and parts, irrespective of their machining process. Our dedicated team of skilled specialists focuses solely on finishing tasks, ensuring that the work on your products is of outstanding quality.
For those seeking an impeccable finish for prototypes and manufactured components, we encourage you to contact our customer service team for a prompt and precise quote. Here is a list of our surface finish options:
- High Gloss Polishing
- Sanding & Polishing
- Painting (Options include Matt, Satin, High Gloss, Texture, and Soft Touch)
- Tinted Finishes (Suitable for materials like ABS, PMMA, PC, PS)
- Anodized Finishes (Types 1, 2, and 3, along with Chemical Film/Alodine)
- Chromed & Metallizing (Including Chrome Sputtering, Color Plating, Zinc Plating, Tinning)
- Logo & Symbol Creation (Silk-Screen, Pad Printing, Rub on, Laser Engraving)
- Powder Coat
- Electrophoresis
- Sandblasted & Bead Blasted
- Heat Treatment
- Blacking
- Water Transfer
Grinding
Grinding involves the use of an abrasive wheel to remove material from a workpiece, creating a smooth surface.
- Common Surface Finishes: Grinding can achieve a very smooth surface finish, often necessary for parts that require high precision and minimal surface roughness. It’s particularly effective for hard materials that are difficult to machine with other methods.
Polishing
Polishing is used to create a smooth, reflective surface by rubbing or using chemicals. It often follows other machining processes to enhance the surface quality.
- Common Surface Finishes: Polishing can produce a mirror-like, highly reflective finish. It’s commonly used for aesthetic purposes and in applications where minimal friction is required.
Lapping
Lapping is a technique that involves two surfaces sliding across each other with an abrasive between them. It’s used to achieve very flat surfaces.
- Common Surface Finishes: Lapping is capable of producing extremely smooth and flat surfaces, often required in high-precision applications like sealing surfaces in valves or in scientific instruments.
Honing
Honing is a precision technique used to improve the geometric form and surface texture of metal parts. It is essential for applications requiring tight tolerances and smooth surfaces, like hydraulic cylinders and high-precision gears.
- Common Surface Finishes: It typically results in a very smooth surface with a fine, crosshatched pattern. Honing is particularly effective in improving the surface finish of internal cylindrical surfaces like bores and also helps in removing surface irregularities.
Milling
- Application in Surface Finish: Milling is a versatile machining process that involves rotating a cutting tool to remove material from the workpiece.
- Common Surface Finishes: Milling can achieve a wide range of surface finishes, from rough to very smooth, depending on the tool used and the milling strategy implemented.
- Context of Application: It’s widely used for both flat and complex surfaces, and the finish can vary from a matte to a glossy appearance. The technique is ideal for creating intricate designs and patterns on metal surfaces.
Sanding and Abrasive Blasting
Sanding involves rubbing the surface with abrasive materials, while abrasive blasting directs a high-speed stream of abrasive material against the surface. These methods are commonly used in preparing metal surfaces for painting, coating, or further finishing and are essential in automotive bodywork and manufacturing of metal furniture.
- Common Surface Finishes: Both techniques are used to smooth a rough surface, roughen a smooth surface, or remove surface contaminants. The resultant finish can range from a satin-like appearance to a heavily textured surface.
Industrial Etching/Chemical Milling
This process involves using chemicals to remove material to create a desired surface finish or design. Used extensively in the aerospace industry for weight reduction and decorative applications in consumer electronics, chemical milling can achieve both functional and aesthetic purposes.
- Common Surface Finishes: It can produce highly detailed and precise patterns, making it suitable for intricate designs.
Coating and Plating
These processes involve applying a layer of material over a substrate, either for protective or decorative purposes. Widely used in automotive, aerospace, and consumer goods manufacturing, these methods add both functionality and aesthetic value to metal parts.
- Common Surface Finishes: The resulting surface can range from matte to high gloss, with varying textures. Coatings and platings can significantly improve corrosion resistance, wear resistance, and electrical conductivity.
Laser Texturing
Laser texturing involves using laser technology to create precise and detailed surface textures on a variety of materials. It’s widely used for creating aesthetic designs and functional surfaces in industries like automotive, aerospace, and consumer electronics.
- Common Surface Finishes: This method can achieve a range of finishes, from fine, detailed textures to more pronounced, patterned surfaces.
Electrical Discharge Machining (EDM)
EDM is a process that uses electrical discharges (sparks) to machine hard metals and materials that are difficult to machine with traditional techniques. It is ideal for intricate designs and precision parts, commonly used in mold-making, tool-making, and die industries. EDM is renowned for its accuracy and ability to machine complex shapes and deep cavities.
- Common Surface Finishes: EDM can produce a variety of finishes, from smooth surfaces with minimal tool marks to textured finishes depending on the spark parameters.
Additive Manufacturing
Additive manufacturing, commonly known as 3D printing, builds parts layer by layer, offering a unique approach to surface finishing. Additive manufacturing is used across various sectors, including medical, aerospace, and automotive, for both prototyping and production.
- Common Surface Finishes: 3d printing can create parts with complex geometries and specific surface characteristics, from rough textures to relatively smooth finishes, depending on the printing technology and material used.
What are the Standards Related to Surface Finish?
Understanding and adhering to surface finish standards is crucial for consistency and quality in manufacturing processes. These standards provide guidelines for measuring and classifying surface textures.
- ISO (International Organization for Standardization) 1302 – ISO standards for surface finish include guidelines for specifying, measuring, and indicating surface texture. They are used internationally and cover a wide range of materials and finishing processes. ISO standards are critical in ensuring global interoperability and quality in manufacturing.
- ASTM (American Society for Testing and Materials) Y14.36M – ASTM provides a set of standards that guide the measurement and characterization of surface finishes. These standards are widely adopted in the United States and provide a basis for quality control, product specification, and manufacturing process optimization.
What is the Cost of Surface Finish?
The cost of achieving a specific surface finish in machining and CNC machining can vary widely based on the complexity of the process, the materials used, and the equipment required. Here are some indicative values and examples in USD:
- Basic Machining (e.g., Turning, Milling): Costs can range from $50 to $200 per hour, depending on the complexity and precision required.
- Precision Grinding: This can cost between $100 to $300 per hour.
- Electrochemical Machining: Prices may range from $150 to $500 per hour.
- Laser Texturing: This advanced technique can cost upwards of $200 per hour due to the precision and equipment used.
- Chemical Milling: Depending on the material and the surface area, costs can range from $80 to $200 per hour.
- Additive Manufacturing: 3D printing can vary greatly in cost, ranging from $10 to $100 per hour, depending on the technology (SLA, SLS, FDM, etc.) and material used.
How To Choose Which Surface Finish Technique is Right for You?

Selecting the appropriate surface finish technique is crucial for the success of your project. Here’s a guideline to help you make an informed decision:
- Determine the Material You Want to Finish: Different materials respond differently to various finishing techniques. Identify the material to understand which methods are compatible.
- Determine the Purpose of the Surface Finish: Are you aiming for aesthetic appeal, corrosion resistance, or reducing friction? The end-use of the product will guide your choice.
- Explore Different Surface Finishes Available for Your Chosen Material: Familiarize yourself with the options available for your material, such as anodizing for aluminum or passivation for stainless steel.
- Consider the Desired Aesthetic Outcome: If the visual appeal is a priority, techniques like polishing or laser texturing might be more appropriate.
- Assess the Durability Requirements for the Surface: For parts subjected to high wear, harder coatings like diamond-like carbon (DLC) may be necessary.
- Consider the Maintenance Requirements of the Surface Finish: Some finishes require more upkeep than others. Factor in the long-term maintenance when choosing.
- Test Compatibility: Before finalizing, test the chosen finish on a small sample to ensure it meets your expectations.
- Consider Environmental Impact: Some finishing processes have a greater environmental impact than others. Choose eco-friendly options if sustainability is a concern.
- Budget Considerations: Finally, weigh the cost of the finishing process against your budget to make a feasible choice.
How does surface finish impact the functionality and lifespan?
Surface finish significantly influences both the functionality and the lifespan of manufactured parts. When you understand how surface finish levels correlate with these aspects, you can make more informed decisions for your projects.
- Reduced Friction and Wear: Smoother surface finishes typically result in reduced friction between moving parts, extending their lifespan. This is particularly crucial in components like bearings and pistons.
- Enhanced Aesthetics: For consumer products, a finer surface finish often correlates with a more appealing look, which can be a critical factor in market success.
- Improved Corrosion Resistance: Certain surface finishes, especially those achieved through chemical treatments, can significantly enhance a part’s resistance to corrosion and environmental factors, thereby prolonging its service life.
- Increased Fatigue Strength: Rough surfaces can act as stress concentrators, leading to premature failure under cyclic loading. Finer finishes distribute stress more evenly, enhancing fatigue strength.
- Optimized Sealing Capabilities: In applications like gaskets and O-rings, surface finish is crucial to ensure proper sealing, preventing leaks and potential system failures.
- Enhanced Heat Transfer: In applications like heat exchangers, a specific surface finish can improve heat transfer efficiency, impacting the overall performance of the system.
Conclusion
Surface finish, a critical factor in manufacturing, significantly influences a product’s functionality, durability, and aesthetics.
Understanding its impact, techniques, and standards is essential for quality and consistency, making informed choices crucial for optimal product design and manufacturing.
Always remember that selecting the right surface finish is crucial and requires careful consideration of the material, the intended function of the product, aesthetic desires, durability needs, and budget constraints.
FAQs
What does a 125 surface finish mean?
A 125 surface finish refers to a roughness average (Ra) of 125 microinches (µin) or approximately 3.2 micrometers (µm). This level of finish is commonly found in general machining and offers a balance between cost-effectiveness and good surface quality. It is suitable for many functional components where high precision is not the primary concern.
